Image Optimization for SEO – Faster Website
Have you ever wondered why some pages load instantly while others lag and lose visitors?
I found that tuning how I handle images was the fastest way to speed up my site and lift search visibility.
I wrote this short guide to share the exact steps I used to choose formats, set dimensions, add alt text, and cache assets.
Those actions made pages render quicker, improved user experience, and helped my pages show up more often in search results.
Along the way I treated images as first-class content. That meant descriptive file names, smart delivery, and testing across devices.
The payoff was clear: faster page loads, steadier rankings, and measurable traffic gains. In the next sections I’ll walk you through the workflow I used so you can replicate these wins across your website.
Why I Prioritize Images for a Faster, More Searchable Site
I learned early that visuals can make or break how fast a page feels to visitors. I made images a priority because they shape both user experience and how search engines parse a page.
I focused on clean file names, clear alt text, and correct sizing. That work raised the odds of appearing in Google Images and in standard search results.
Faster files helped users get information quickly. Visuals increased engagement—content with strong visuals often gets far more views. I tracked engagement and conversion to prove the gains.
- I treated visual hygiene as routine site maintenance across templates.
- I paired each visual with nearby explanatory text for context and clarity.
- I balanced uniqueness with relevance to improve click appeal in results.
| Focus Area | Why I Did It | Measured Result |
|---|---|---|
| Naming & Alt | Helped search engines understand context | Better placement in image packs |
| File Weight | Reduced bytes that slow pages | Faster page loads, lower bounce |
| Accessibility | Aligned alt text with content use | Improved user access and engagement |
Understanding Image SEO and Where Images Appear in Search
I mapped where my visuals surface so I could target each placement with intent. I focused on three main placements that drive clicks and clarity for users. The strategy raised visibility across my site and helped pages draw more engaged visitors.
Google Images, image packs, and visual search
Google Images and image packs are obvious spots, but Google Lens is now a major gateway. Lens processes billions of visual queries monthly, so clear, distinctive visuals can trigger matches beyond classic results.
On April 29, 2024, image packs appeared in 55.62% of U.S. SERPs. That data pushed me to make every key visual count.
How optimized visuals influence SERPs and user experience
When I aligned filenames, alt text, and surrounding copy with intent, search engines found stronger relevance signals. Thumbnails and richer visuals improved click-through rates and user trust.
- I tested photos, charts, and illustrations to see what worked in different placements.
- I kept delivery fast so visuals helped rather than slowed pages.
- I tracked which queries triggered packs in my niche and tailored assets accordingly.
| Placement | Why it matters | My focus |
|---|---|---|
| Google Images | Pure discovery for visual queries | Clear captions and descriptive file names |
| Image packs in SERPs | Boosts clicks on standard results | Thumbnail testing and intent alignment |
| Google Lens | Visual match and real-world lookups | Distinctive, high-contrast visuals |
How I Choose or Create the Right Image for Each Page Goal
For each page I start by asking what action I want the reader to take. That goal guides whether I use a photo, diagram, chart, or screenshot.
I prefer original photos for product pages and crisp illustrations for concepts. Screenshots work best for step-by-step guides that teach a user how to act.
I always verify permissions for third‑party visuals to avoid legal issues on my site. I place critical visuals near matching text so relevance is obvious to readers and to search crawlers.

- I choose people or product shots only when they clarify intent, not as filler.
- I create diagrams to turn dense text into quick, scannable meaning.
- I use screenshots to show exact steps and reduce support queries.
| Type | Use | Benefit |
|---|---|---|
| Photo | Showcase product | Builds trust and authenticity |
| Chart/Graphic | Explain data | Speeds comprehension |
| Screenshot | Demonstrate steps | Reduces confusion |
I review each visual’s role—explanatory, persuasive, or navigational—and prioritize clarity over trendiness. This simple discipline helped me better optimize images for search and for users in India.
Picking the Best Image File Formats for Quality and Speed
Picking formats that match content type made a bigger speed difference than I expected. I now choose formats by purpose rather than habit to keep pages light and clear.
When I use WebP, JPEG, PNG, SVG, and why GIFs are risky
I default to WebP for most assets because it cuts file size while keeping image quality high. WebP supports transparency and animation and offers both lossy and lossless modes.
I keep JPEG for photo-heavy scenes when broad compatibility matters. PNG stays for transparency or text-rich graphics where lossless quality is essential.
SVG is my pick for logos and icons since it scales without pixelation. I avoid GIFs for animations; they are heavy and often slow pages. I replace long loops with short videos or animated WebP where possible.
Compatibility considerations and fallback strategy
- I build a fallback chain so older browsers still get a usable file. I check support with CanIuse and use tools like Squoosh to convert formats.
- My CDN and build tools handle on-the-fly conversions, which helps speed for varying devices and sizes.
- I document format rules so contributors choose the right option and I can measure gains across the site.
| Format | Best for | Trade-off |
|---|---|---|
| WebP | Most photos & animations | Smaller files, modern support |
| JPEG | Standard photos | Wide support, larger than WebP |
| PNG / SVG | Transparency, icons, logos | PNG: larger; SVG: infinite scale |
Naming the Image File the Right Way
A short, precise file name saves time and helps the page show the right preview in results. Google uses file names as one signal, so I treat naming as part of my content workflow.
I keep names concise and descriptive. I use hyphens to separate words, avoid spaces, and remove camera defaults like IMG00353.jpg. For example, I prefer apple-iphone-15-pink-side-view.jpg over cryptic or padded names.
- I write descriptive, concise file names that mirror what the image depicts and how it supports the page.
- I align the file with the primary topic or target query, but I avoid stuffing keywords.
- I localize names for translated pages so terms match user intent in that language.
- I keep a naming convention per content type—product, blog, documentation—for consistency.
- I track renamed assets during QA to prevent broken references in templates and CSS.
| Good Name | Why | Bad Name |
|---|---|---|
| apple-iphone-15-pink-side-view.jpg | Descriptive, hyphenated, intent-aligned | IMG00353.jpg |
| service-flowchart-steps.svg | Clear role for on-page text and accessibility | final_v2_chart.svg |
| chaat-street-vendor-delhi.jpg | Localized and relevant for Indian users | foodpic2024.jpg |
Writing Alt Text That’s Accessible and Rank-Worthy
I write alt lines that explain purpose, not just name what’s shown. Alt text lives in code to help screen readers and give search engines clear context about a visual’s role on the page.
Context-driven alt text vs. decorative images

I focus alt on functional visuals that carry meaning for the user. For decorative items I use an empty alt attribute so assistive users aren’t burdened with noise.
- I describe purpose and key content, avoiding filler like “image of.”
- I keep each alt concise—aiming under ~125 characters so assistive tech reads cleanly.
- I adapt the alt when the same visual supports different explanations on different pages.
- I place crucial facts in nearby body copy or captions so everyone can access them.
- I audit assets, train contributors, and validate changes with accessibility tools.
As an example, a product shot becomes “green kurta front view with wooden buttons” rather than a generic label. That makes the page clearer for both users and bots while staying natural and helpful.
Resizing Images to the Displayed Dimensions
Matching asset dimensions to container width saved me bytes and reduced load times. I checked each template and resized files so the displayed size matched the container max width.
I split assets by role: hero visuals, product zooms, and small thumbnails. That helped me avoid serving a large file when a tiny preview would do.
I reviewed analytics to find common screen breakpoints and exported practical sizes instead of blanket 4K files. Many visuals never need to exceed about 2,500px for real-world viewing.
- I capped exported widths to match the largest container used on the page.
- I used CMS and build tools to generate multiple sizes on upload so responsive variants are ready.
- I tested rendering on mobile and desktop to keep crispness while reducing file size and overall page weight.
| Role | Typical Width | Purpose |
|---|---|---|
| Hero | 1200–2000px | High-impact visuals |
| Product zoom | 1600–2500px | Detail view for buyers |
| Thumbnail | 150–400px | Fast previews, low bytes |
How I Compress Images Without Ruining Image Quality
Finding the sweet spot between small files and clear visuals became a routine step in my workflow. I treat compression as a quality control task that keeps pages quick to load and visuals honest.
I choose lossy or lossless based on the visual role. Lossy removes data for much smaller file size; lossless trims bytes with no visible change but saves less. For photos I usually use lossy at quality 75–85 and export at 72 PPI for the web.
Settings, targets, and what I aim for
My practical target is often near 100 KB where feasible. I remove EXIF unless rights or workflow need it. I test outputs on both retina and standard screens to keep perceived sharpness.
Recommended tools and routine
- I run batch jobs through TinyPNG or Squoosh for fast, repeatable results.
- I use ImageOptim or JPEGmini in my desktop pipeline for extra savings.
- When needed I try GIMP or Kraken and compare WebP, JPEG, and PNG to pick the smallest acceptable file.
| Choice | When I use it | Result |
|---|---|---|
| Lossy (75–85) | Photos, thumbnails | Smaller file size, good quality |
| Lossless | Logos, labeled graphics | No visible change, modest savings |
| Pipeline tools | Batch or CI/CD | Consistent bytes saved and faster loading |
I also bake compression into CI/CD so no page ships with oversized files. I track byte savings across templates and recheck critical pages after design changes to keep targets intact.
Responsive Images, Srcset, and Specifying Width and Height
Serving scaled assets per device cut my page weight and made layouts more stable. I used srcset so each screen gets an appropriate file and fewer bytes travel over slow networks.
Since WordPress 4.4, srcset is added by default, which helped me deploy responsive delivery quickly across the site. I always declare width and height so the browser reserves space and avoids layout shifts that hurt Core Web Vitals like LCP.

I keep CSS for responsive display but align intrinsic dimensions in HTML with exported size to keep rendering sharp. Remember: CSS changes scale, not file bytes.
- I implemented srcset so each device receives the most appropriate size.
- I declared width and height to reserve layout space and eliminate CLS.
- I paired responsive delivery with compression to reduce loading on mobile.
- I tested mobile scenarios because Google indexes pages by mobile first.
| Action | Why it matters | Result |
|---|---|---|
| srcset & sizes | Serve per screen width | Lower bandwidth, faster page render |
| width & height | Reserve layout space | Stable layout, better LCP |
| CSS scaling | Adjust display | Consistent user experience |
Implementing Lazy Loading the Right Way
When I switched to native lazy loading, above-the-fold content began to paint much sooner. I added loading=”lazy” to assets that never appear on initial view. That change cut the bytes the browser must fetch on first render.
I only apply lazy loading when a visual is guaranteed below the fold on all devices. If a hero or critical visual might appear on small screens, I leave it eager. Getting this right keeps the first meaningful paint fast for users on slow mobile links in India.
- I audited templates so hero and critical elements are not lazily loaded on any device.
- I deferred nonessential visuals and combined lazy loading with responsive sizes to reduce later downloads.
- I tested scroll-triggered behavior and validated carousels, tabs, and third-party widgets so content loads when visible.
- I used native attributes over heavy JavaScript and measured gains with lab and field data before full rollout.
| Action | Why I did it | Result |
|---|---|---|
| Add loading=”lazy” | Delay noncritical fetch | Faster initial page render |
| Audit templates | Prevent hiding above-fold content | No perceived slowdowns |
| Test behavior | Ensure prompt fetch on scroll | Smooth interaction for users |
Speeding Up Delivery with a CDN and Smart Caching
Switching to edge delivery and tight cache rules was one of my quickest wins for site speed. I moved static assets to a CDN and tuned caching so pages and media reached users with fewer network hops.
Edge delivery and DNS steps
A CDN hosts files on many edge servers so content is served from the closest fast node. I used providers like Cloudflare and CloudFront and tested image CDNs such as Cloudinary, ImageKit, and Sirv to transform and serve variants on demand.
Implementation was practical: integrate the provider, upload or point assets, update DNS records, and swap asset URLs. I kept an origin fallback so traffic can route to my server if an edge node has issues.
Browser caching and cache policy
Browser caching stores static assets for set durations and cuts repeat downloads. I set long cache lifetimes for static images and versioned filenames when I changed content.
I validated cache headers with Lighthouse and measured TTFB and overall page render times after the CDN rollout. I also ensured bots and engines could fetch assets and monitored CDN logs to catch broken references fast.
- I enabled a CDN to serve images from edge locations for lower latency across regions.
- I updated DNS and asset URLs so requests reliably route through the CDN.
- I used an image CDN to resize and reformat on demand per device.
- I set long cache lifetimes, used versioned filenames, and documented a fallback path to origin.
| Feature | CDN / Edge | Image CDN | Browser Cache |
|---|---|---|---|
| Primary benefit | Lower latency via nearby nodes | Real-time transforms and format switching | Fewer repeat downloads from client |
| Setup | DNS update, provider config, SSL | Integrate API or URL transforms | Set Cache-Control and version files |
| When to use | Global audience, reduce TTFB | Multiple device sizes and formats | Static assets that change rarely |
| Risk / note | Edge outages — require fallback | Costs for transforms at scale | Must invalidate or version on updates |
Creating and Maintaining an Image Sitemap
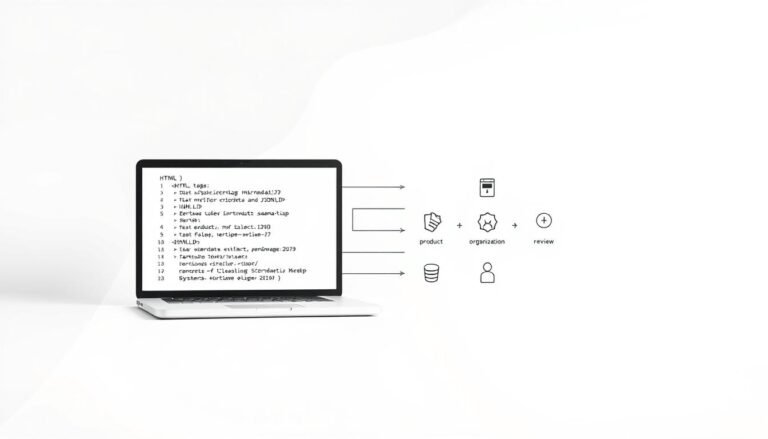
I created an image sitemap as an XML file that lists images for crawling and indexing. I used Google’s image namespace and a urlset with image:image entries so parsers can map pages to their visuals.
This file helped search engines find assets that my frontend scripts or lazy loading might hide. For pages rendered by JavaScript, the sitemap provided explicit paths and useful data for indexing results.
I automated generation so new images appear without manual work. I kept the list focused on primary visuals and skipped decorative assets to avoid clutter and wasted crawl budget.

- I ensured each URL matched the canonical page and was crawlable by bots.
- I validated the XML with testing tools and fixed formatting errors promptly.
- I combined this file with standard sitemaps when that simplified maintenance.
- I monitored indexing signals and server logs to catch blocked or missing entries early.
| Structure | Purpose | Tools |
|---|---|---|
| urlset + image:image | Map pages to primary images for crawlers | Sitemap generators, CMS plugins |
| Canonical URLs | Ensure correct paths and avoid duplicates | Validation tools, server logs |
| Automated updates | Keep data current without manual edits | CI pipeline, image sitemap plugins |
On-Page SEO Signals That Help Image SEO
Clear on-page signals helped me tie images to topic intent and improve discoverability. I keep title tags near 50–60 characters and meta descriptions around 105 so snippets and visuals show cleanly in results.
I place images next to the paragraph that explains them. Captions are used only when they add meaning or speed scanning for users. That keeps the page tidy and reduces confusion.
I align headings, file names, and surrounding text to reinforce topic signals. I also add internal links around image-heavy areas so equity flows to important pages on the site.
- I write clear titles and concise meta lines that match nearby text.
- I avoid overloading a page with visuals that don’t serve the copy.
- I track impressions and clicks to see which signals move the needle.
- I keep accessibility intact while pursuing visibility gains.
| Signal | Why it matters | Practical tip |
|---|---|---|
| Title & meta | Helps search show relevant snippets | Keep length tips: 50–60 / ~105 chars |
| Placement | Tightens context for crawlers and users | Place visuals beside explanatory text |
| Captions | Improves scanning and clarity | Use only when helpful |
Adding Structured Data and Open Graph for Rich Results
I made structured data and social meta tags part of my publish checklist to control how pages look when shared and indexed. This small step helped ensure the right preview appears across the web and gave me clearer rich results in feeds and search.
Schema types to reference images correctly
I use schema markup to point search engines to the main image and its properties. For articles and products I add ImageObject entries with creator and license fields so the data is explicit. I follow Google’s structured data guidelines and confirm each URL is crawlable.
Open Graph and Twitter Cards for better social previews
I set og:title, og:type, og:image, and og:url so shares show the intended photo and message. I also add Twitter Card tags and pick large, high-quality images for previews to boost clicks. I validate with Facebook Debugger and Twitter Card Validator and clear caches when needed.
- I added structured data to identify primary images for articles and products.
- I used ImageObject to include creator and license details and kept the data crawlable.
- I validated markup, fixed flagged items, and kept schema aligned with the page content.
- I automated defaults in my CMS so every new page has basic tags and defaults.
| Feature | Benefit | Practical step |
|---|---|---|
| Schema (ImageObject) | Clear rich results | Include creator, license, URL |
| Open Graph / Twitter | Consistent social previews | Set og:image and card tags |
| Validation | Fewer errors in results | Use platform validators and fix issues |
image optimization seo: My Step-by-Step Workflow
I treated every visual like a mini product: purpose, format, size, and delivery. That mindset made it simple to follow the same steps for each page and measure results.
First I define the page goal and pick or create an asset that supports it. Then I choose formats—usually WebP with JPEG fallbacks—and name files with hyphens and localization where needed.
I write context-aware alt text, skip decorative visuals with an empty alt, and resize to the displayed dimensions. I export responsive variants and compress to target quality before upload.
- I integrate srcset and explicit width/height to prevent layout shift.
- I lazy-load content below the fold and serve through a CDN with long cache lifetimes.
- I update the sitemap, add schema and OG tags, and verify with Lighthouse and PageSpeed Insights.
| Step | Why | Tool / Check |
|---|---|---|
| Format & name | Clarity and compatibility | WebP, JPEG, file naming rules |
| Resize & compress | Lower bytes, keep quality | Squoosh, ImageOptim |
| Deliver & verify | Faster render, fewer errors | CDN, Lighthouse, Semrush |
How I Audit, Test, and Monitor Image Performance
I run a monitoring routine that flags crawl blocks, missing alt text, and slow loading so I can act fast. I use Semrush Site Audit to find broken internal and external assets and to surface blocked resources.
I test templates with Google Lighthouse and PageSpeed Insights for lab metrics. I validate real-world loading with WebPageTest and Pingdom across Indian mobile networks so results reflect actual users.
- I review caching and CDN headers to ensure long-lived, versioned assets and to prevent stale delivery.
- I inspect robots.txt and header responses so visuals remain crawlable by search engines.
- I prioritize high-traffic pages so fixes move the biggest needles on the site and in search results.
- I log each fix, track data trends, and measure impressions and clicks to confirm improvements.
- I schedule recurring checks to catch regressions before they affect page performance.
| Tool | Purpose | Outcome |
|---|---|---|
| Semrush Site Audit | Find broken links and missing alt | Actionable list of fixes |
| Lighthouse / PageSpeed | Lab metrics for core web vitals | Targeted template changes |
| WebPageTest / Pingdom | Real-world load testing | Validated improvement across networks |
Conclusion
A small, repeatable routine around visuals paid the biggest dividends for page speed and discoverability. I focused on consistent formats, sizing, compression, and fast delivery so each page loads sooner on Indian networks and feels reliable for users.
I treated every image as content: descriptive names, clear alt, structured data, and social tags. That stack improved how my website appears in search and boosted rankings and results over time.
I keep testing with Lighthouse and auditing with Semrush. A living checklist lets teams ship better assets by default, and the compounding effect lifts the whole site experience. Use this guide as a workflow you can repeat and refine.